Showing posts with label DIY. Show all posts

Monday, April 8, 2013

DIY- Superhero Wooden Cutouts!

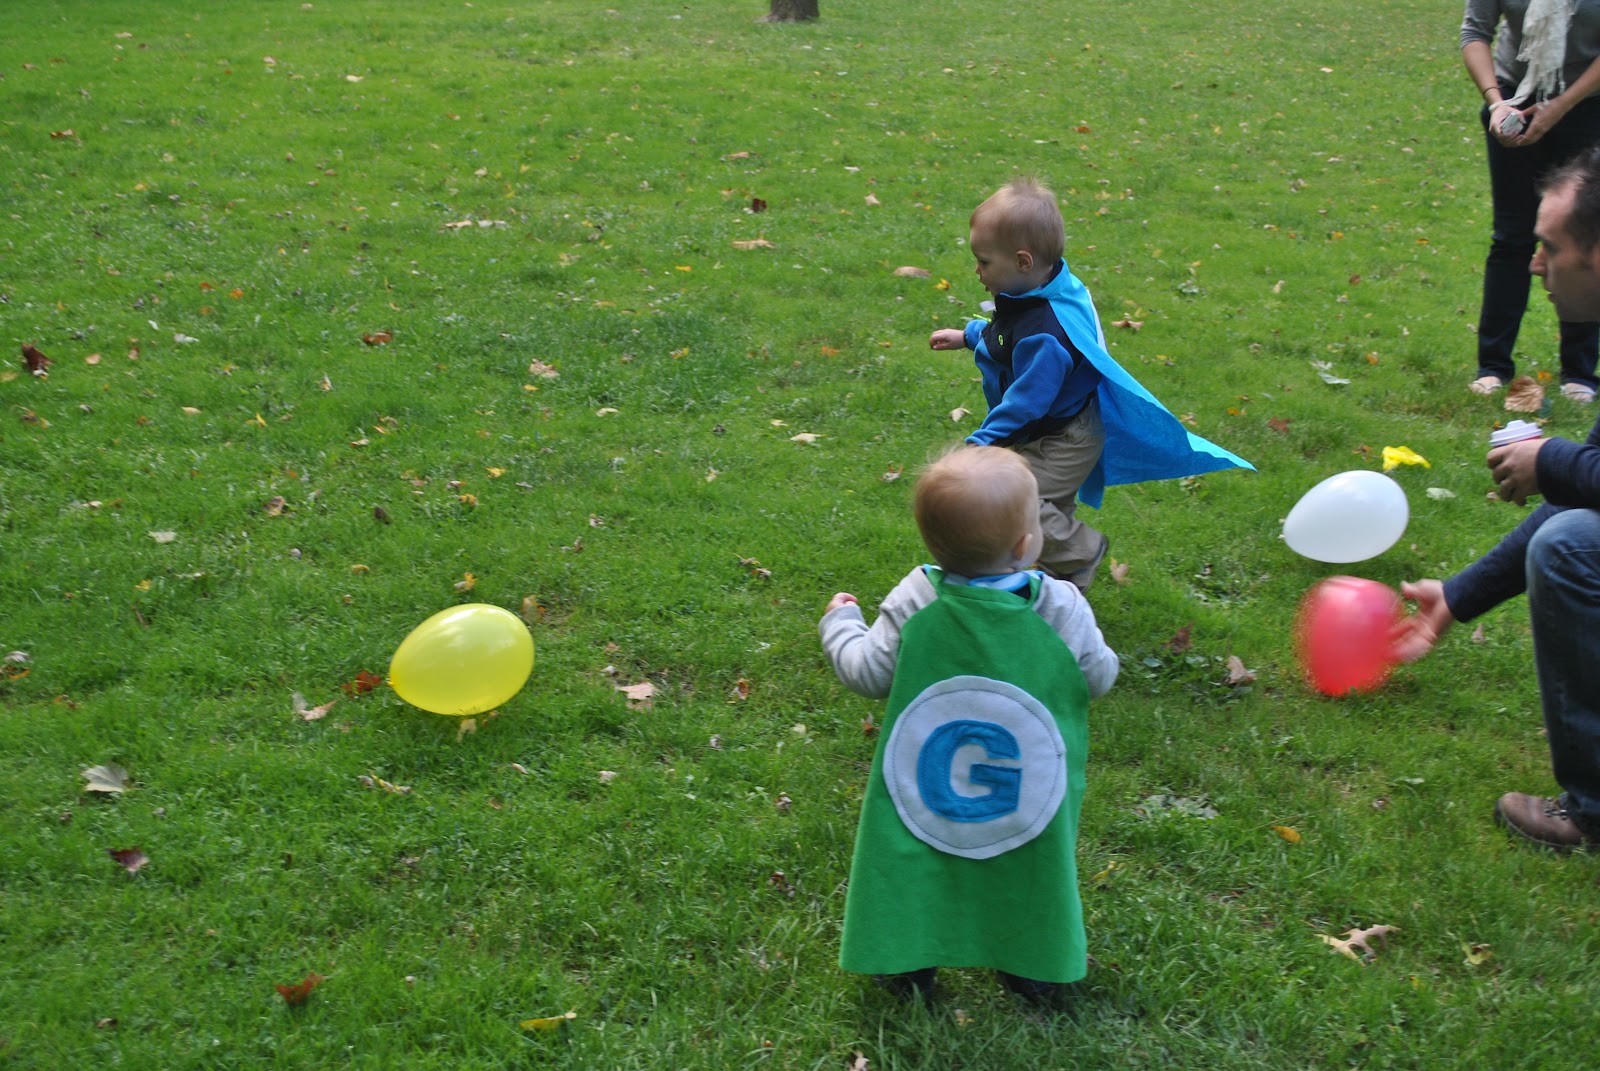
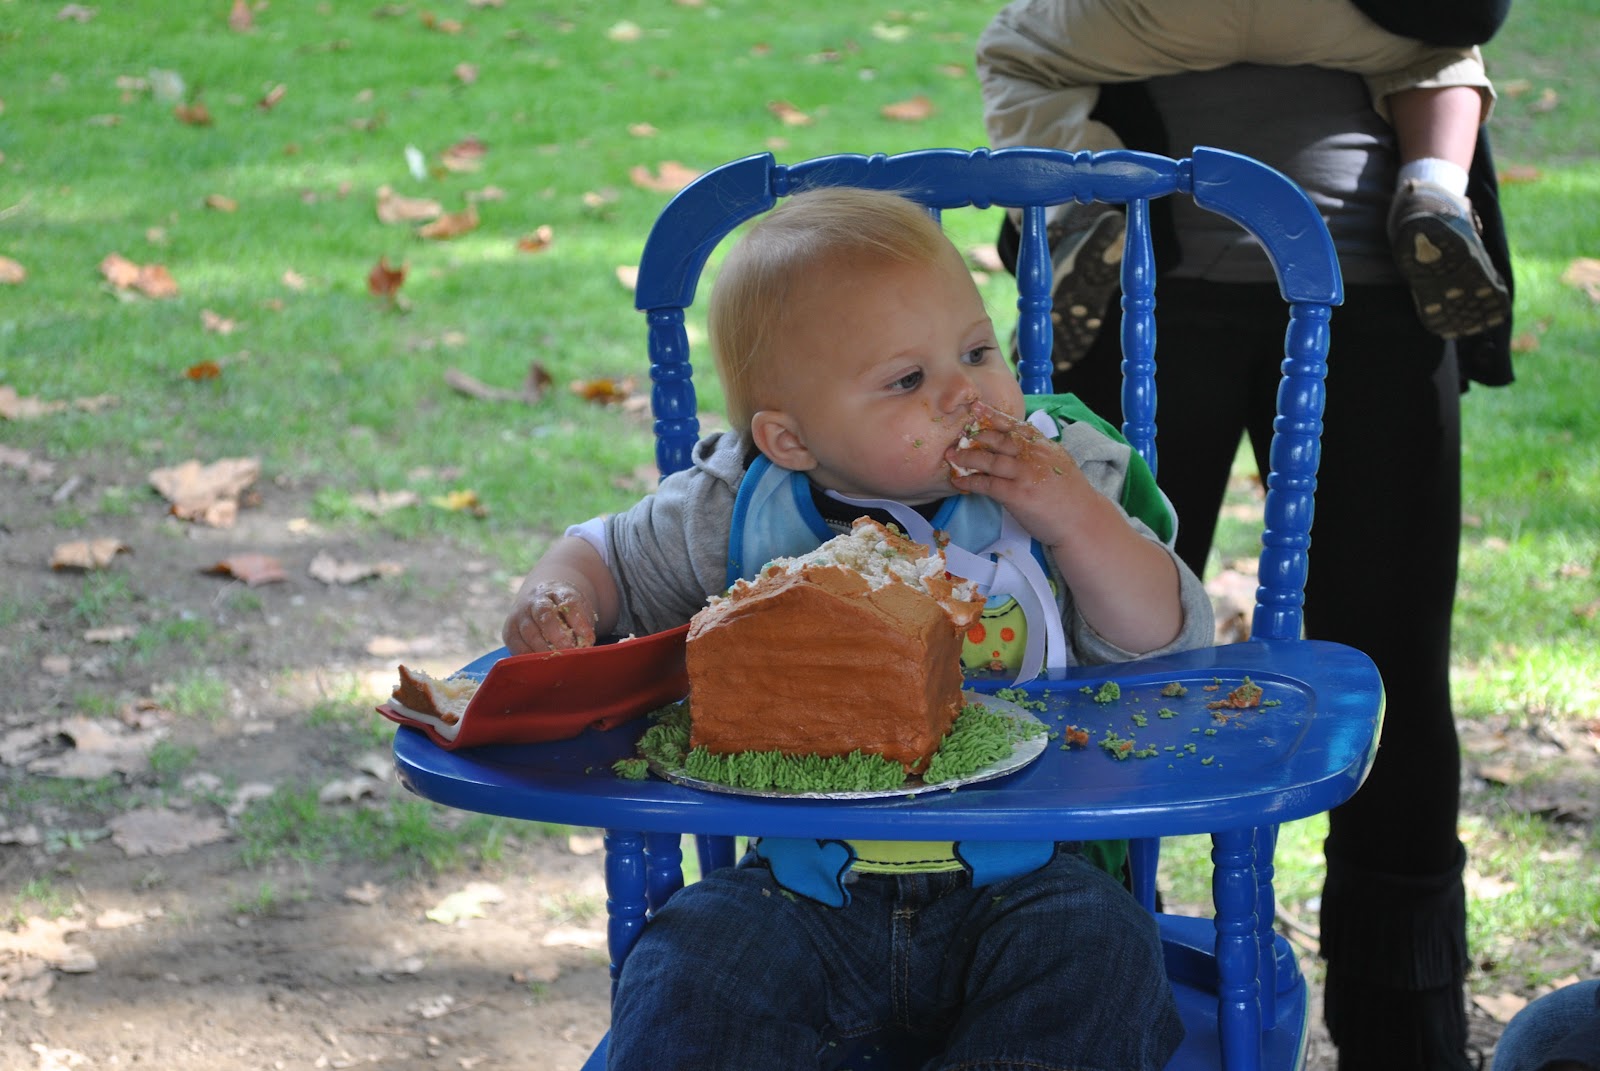
Way back in September we had a Super Why themed first birthday for the Grayson Boy.  Like, for real, the kid was obsessed with that show so it was the only reasonable option for his big my-parents-kept-me-alive-for-a-whole-year shindig.
 
I did alot of DIY projects for the party- a birthday banner, a high chair re-do, custom superhero capes, cupcake face toppers, and these wooden cut outs for the kids to pose with and have their picture taken as a Super Reader.  I created tutorials for alot of the projects, but recently Ive been contacted alot about how I made these guys- so I decided to post directions on how I made them.
 
 
First, I have to let you in on my dirty little secret. I can NOT draw. Seriously, stick figures are as good as it gets.  When I try to draw diagrams on the board in class my students are often like, please just stop. Its that bad.  So how did I manage to make these guys look so darn good?
 
With this guy.


Yep, the overhead projector the teacher used in school to put notes up on the board.
 
I found one at a yard sale for $15 dollars and brought that little guy home, because I knew it would come in handy one day.  It just so happened that I was right.
 
First I went onto Sprout and printed out some coloring book pages of the characters.  Then I took them to a local copy store and ran them off on transparencies (clear plastic paper).  If you have a laser printer you can probably print right onto the transfer paper, but I have an ink jet so it would just smear like crazy on the transparency.
 
Then I had to pick up my board.  I used 4 x 4 Luan- which is a is a thin layer of plywood veneer made from tropical wood. Plywood is a wood panel made of thin layers of wood veneer glued together, but Luan typically has a solid core of wood between two layers of veneer, though the solid core may have problems with voids and dry spots in the glue of the veneer. It tends to be softer and lighter than most plywood. It cost me around $6 per sheet and I knew I could get two characters on one board- so roughly $3 per piece.  You can always get thicker plywood, its just up to you. 
 
I primed the Luan and set up the projector in the front hallway and got to work.  I positioned the first character on the overhead projector and fiddled until it was taking up the left half of the board.  Then I got to work with my Sharpe marker tracing the projected image.  I knew I would go back and paint over the lines with black craft paint, so this was just a quick trace to get the picture transferred.


Once I got one traced, I flipped the second character over and positioned it on the other side and repeated the process. Then I went back with a small paint brush and black craft paint and filled in all of the lines.
 
 
Once the black lines were dry it was time to bust out the craft paint.  I actually printed the characters out in color, then took that paper to the paint aisle at JoAnn's to match colors.  It was also really helpful to have them in color while I was painting, so that I didnt make any mistakes like mixing up two colors. Then I started painting.  It took maybe an hour and a half to paint both characters fully, then I let them dry and went back over the black edges again to clean up any painting out of the lines.
 
 
I will tell you that when you do this on your own you will look at it and see all of these little imperfections, but when you take a picture of it you will not see them at all- so don't freak out.  Once its all dry you send the husband out to the garage with the jigsaw to cut the characters out and build a small three sided box to affix to the back with some glue.  Then all you have to do is drive a garden stake into the ground and they stand up perfectly!
 
 
Then you just stick the birthday boy behind the Super You and take as many pictures as he will let you- which if you have my child, is about two before he runs away.
 
 
All total the project took maybe five hours total, from tracing to cut out and the total cost was somewhere around $35.  Not too shabby, but if you didn't already own the transparencies or most of the craft paint it could cost a bit more.  Even still, people on Etsy charge upwards of $50 per character, so it was a smart DIY choice.

Thursday, January 31, 2013

DIY Birth Announcements

Hello, Lovelies! Dropping in today to share with you a post I was lucky enough to share with Kristens readers over at Life With The Ellwoods over a year ago.

Birth Announcements.
 You have to do them.  I mean, come on, you spent 9 months baking the bean you want to show him or her off.  But have you checked the price of them out?

Sorry kiddo, can't send you to college- we spent all our money on birth announcements. 

I spent hours pouring over the Internet looking for the perfect announcement.  The ones I absolutely loved?


These beauties are from Minted.com.  If you click on the picture it will link directly to the listing.

They were perfect, sweet, simple and unique.  Oh, yeah, they were also $2.20 each. We needed 100 to send out to all of our family/all of the people who came to the baby shower.

They had a similar one at Shutterfly.com


They were cheaper, at $1.35 each...but still way too much for my cheap pocket's liking.

Enter Pixlir.com.

I made these little babies for free, then printed 4x6 prints at Ritz camera to the tune of $0.09 each. Yeah, that's right nine cents each.  Oh, and the nice people at Ritz gave us the envelopes for free as well. Score!


If you haven't used pixlr before you need to check it out. You dont need an account, and it works like photoshop but is much easier. They have a few options, either express or avanced- but Express seems to work for most of my needs.

Start by uploading a photo, then have fun playing around with the different effects. You can add text, crop, color splash- tons and tons of different effects.

If you want a 4 x 8 flat card, just click on the collage tab at the beginning. Then you can choose your layout and upload photos from there.

Then choose your style, I like the four boxes side by side.
Drag and drop your pictures where you want them, leaving one block free for text. Once you finish, click finished and then it will bring you to the editing screen where you can add the effects you want.

When you're all done, click save- and thats all there is to it!

Then you just upload it to any photo printing site as a blank 4x8 card, and you're good to go.  We made similar ones for Grayson's baptism, and they cost $0.54 each at Ritz, and that included the envelopes.


And there you have it. DIY birth announcements for super cheap, and they take almost no time to make.
 

Tuesday, January 29, 2013

DIY Valentine Decor

Hello, Lovelies!! Just stopping by to show you the cute little valentines centerpiece that is now gracing my kitchen table. 
 

So super easy to make- all you need is a scrap of red burlap, some brown burlap, white ribbon and a mason jar. 
 
All I did was cut a rectangle of the red burlap long enough to wrap around the jar. Then I hot glued it onto a clear mason jar. A piece of left over white ribbon went over that, and I free handed a heart out of the brown burlap and attached both with hot glue.  I plunked in some fake hydrangeas I have left over from our wedding centerpieces and there you have it. All total, it took maybe 4 minutes- which is perfect for DIY decor in my book.


Close up!
 
Another good reason that it only took four minutes to make was that was all the time it took for this guy to destroy the cupcake I gave him as a distraction while Mommy crafted.
 
Hes such a hot mess. I love it.

Monday, January 28, 2013

Coffee Body Scrub

Back in college, a girlfriend of mine wanted to have a spa party. The problem was we were all far too broke to actually go out and purchase spa treatments. So I decided I could make something to bring, and this scrub was born after I started hunting through my kitchen cabinets. 
 
 
What you'll need: Coffee (the cheaper the better, baby), kosher salt or sugar, olive oil (baby oil also works) and a splash of vanilla.
 
Start by combining about a cup or two of coffee with about 1/2 cup of salt- literally you cant screw this up, which is also why it rocks.  Just toss a handfull or two of each into the bowl.
 
 
Then add in about 2-3 tablespoons of oil. You just kind of want to coat everything. If you add too much oil, it can tend to clump together. After you stir it up, add in a splash or two of vanilla. This makes it smell like a latte, which I love and vanilla is also soothing to the skin.

 
Once its all mixed up, you can take a big handful and rub it into your skin.  The coffee and the salt exfoliate off the rough, dead skin, and the oil and vanilla put some moisture back. Something I found out later is that coffee is supposed to have properties in it that when it is applied to the skin it energizes the fat cells in skin and helps to break up cellulite. 
 
Now is this medically proven? I have no idea. A professor in college told me that and it always stuck. Especially since my arse hasn't seen the inside of a gym since Grayson was born and lets face it, it cant hurt either way.
 
The proof as they say- is in the pudding. So here is my before shot of my pasty leg. Keep in mind I live in Pittsburgh and my skin is supposed to be the color of liquid paper in January.
 
 
and the after- before I rubbed on any lotion.
 
While still liquid paper white- all of the dry skin has been removed and my skin is much softer. So much so that even the hubs noticed, which is nothing short of amazing.
 
You can make your own version of this scrub by playing around with things in your kitchen, so you never have to pay for a good spa treatment again!
 
Let me know if you have a good sugar scrub recipe- I'm always looking for new ones to try!


Monday, October 1, 2012

Super Hero Cape Tutorial

I can not sew, but for the sake of Grayson's birthday I learned.  Let me tell you that if I can make these capes, then so can you.
 
You need:  1 yard of fabric (I used flannel and got two capes per yard)
1 piece of white or black felt
1 5x5 square of coordinating color fabric
1.5 feet of ribbon
 
 
First, fold the yard of fabric in half length wise. Cut it, then refold it in half again length wise.
Using a piece of chalk measure out from the fold 7 inches.
Then two inches down.
Then three inches in.
Once you have the neck of the cape marked off, draw outward toward the edge of the cape to create the shape. How far down you go depends on how tall the kiddo is. This one was for a pretty tall 5 year old, so I went down 30 inches.


Then, cut it all out.
 
 
To make the circle I used a 9 inch pie plate and traced a circle and then cut it out.
 
 
To create the letter, I used word to make a template of the first letter of the kiddos name. Then I cut out the template and reversed it on the fabric. I traced and cut it out, so that the lines from my tracing would be on the back.
 
 
Please forgive that I have 15 different pictures of the steps- I made all of the capes in a big batch and didnt always take the picture on the same cape. Oops.
 
Anywho, pin your letter to your felt circle and sew it on using a zig zag stitch set on 3.


Once thats attached, its time to attach it to the cape itself and sew it on with the same zig zag stitch.


Take the 1.5-2 feet of ribbon and fold it in half. Place that in the 2 inches of fabric at the neck. Fold it over and pin it in place. Sew it in a straight line to secure the ribbon and voila. You're done!
 
Each cape takes around 15 minutes to make from start to finish, but the kiddos loved them so much it was well worth it!


Saturday, September 29, 2012

A Super (Why) First Birthday Party!

This past weekend we celebrated Grayson's First Birthday. It was a cool day, but the weather cooperated and the rain held off until we got everything packed into the car to come home. I shared with you all my inspiration board a few months back (see it here) and I'm excited to say that my vision actually did come together nicely! Grayson is obsessed with the cartoon Super Why, so that was the overall theme. We rented a local park with an amazing playground and had wayyy too much food. It was an awesome celebration for our little guy, and we're so thankful to everyone who made it out!
 
Our Invite- made by the amazing Rachael over at La Petite Giraffe. She did an amazing job and was so easy to work with- I had the finished proof within 48 hours of placing my order, and thats even after I asked her to make changes and added a custom item. Check her out on Etsy and see what she has to offer!
 
I made this banner to hang over his high chair- I wanted a nice back drop for all of those smash cake pictures!


My insanely talented friend Julie made Grayon's cake and his smash cake. How cute is it that she made him the book club as his smash cake and its all 100% edible. I made the cupcake toppers to put on some cupcakes we got from Sams Club. They were really easy and took almost no time at all to create.
 
 
I made these little capes for all of the kids to go in their treat bags, but I tied Graysons to his blue high chair to give it a little pizazz. Go here for the cape tutorial and here to see how I took a cheap high chair to this blue beauty!
 
 
My other crazy project was paining the cast of characters on Luan board and having hubs cut them out. We wanted the kids to be able to have their pictures taken with them, and they were a huge hit. All total they took about 5 hours to make, go HERE for the tutorial on how I made them.
 
The kids went nuts for them, so it was time well spent!
 
 
Settling our debate the old fashioned way- ps, I totally kicked hubs ass in this poll. Hes still bitter.
Singing Happy Birthday

 
Nom Nom Nom
The aftermath- he did pretty darn good!
 

Trying for a group picture
 
This is about as good as it was going to get. Trying to get 12 little ones to sit still after sugaring them up with cake wasnt happening.
 

Grayson and Aunt Ashley

Opening presents - this was when he was actually into it. After awhile the sugar wore off and he opened the rest like this.

Happy Birthday Grayson Boy- Daddy and I love you so much!!